
Plain-English summary#
The Dine-In page shows a floor plan of your restaurant — tables laid out the way you arranged them. Staff tap a table to open a new order or see what's already on it. A waiter handles "Table 3 wants two coffees" without typing anything: tap the table, add items, and the order stays tied to that table for the whole visit.
When you'd use this#
Sit-down service where the order grows over time (starters → mains → desserts → bill). The floor plan replaces paper tickets and makes it obvious who's still eating and who's ready to pay. Takeaway and delivery don't need this view — they use the Counter directly.
How to access#
- Sidebar: the dining-table icon in the Foodops sidebar
- From the POS Counter: click the Dine-in button in the top-right
Prerequisites#
- At least one floor set up for the outlet (a default "Ground Floor" is created for you)
- At least one table on that floor (created in Settings → Outlets → Outlets → [your outlet] → Floor plan)
- An open register session — dine-in orders can't be created without one. See Sales Sessions for how registers work across devices.
Walkthrough — open a dine-in order#
1. Open the Dine-In page#
Click the dining-table icon in the sidebar. The floor plan loads with your tables in their set positions.
2. Understand the floor plan#
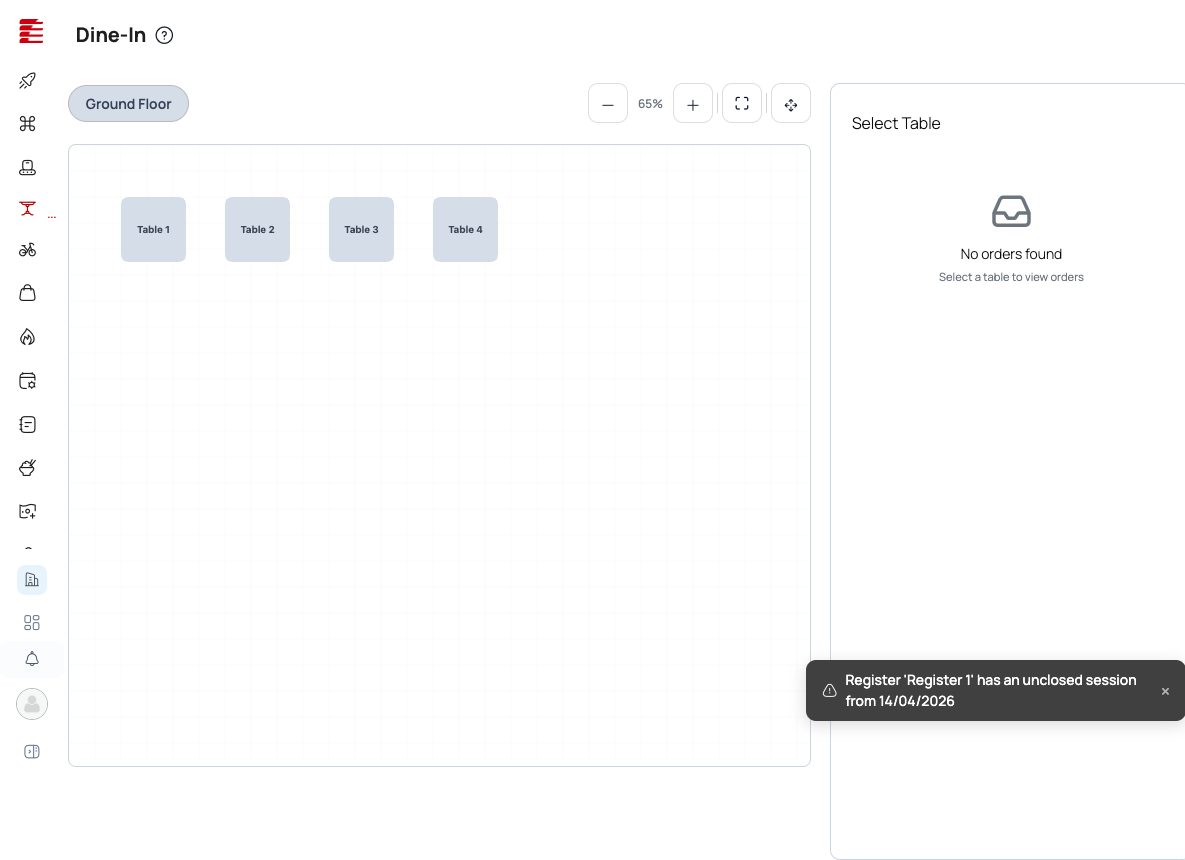
The main area is your floor plan, with tables drawn on a grid. In floor-setup mode you can drag tables to rearrange them.
Controls at the top:
- Floor tabs (left): "Ground Floor" and any other floors you've created
- Zoom controls (right): −/+ buttons, percentage display (default 65%), fullscreen toggle, pan/drag mode
Table colours:
- Grey — Available (no active order)
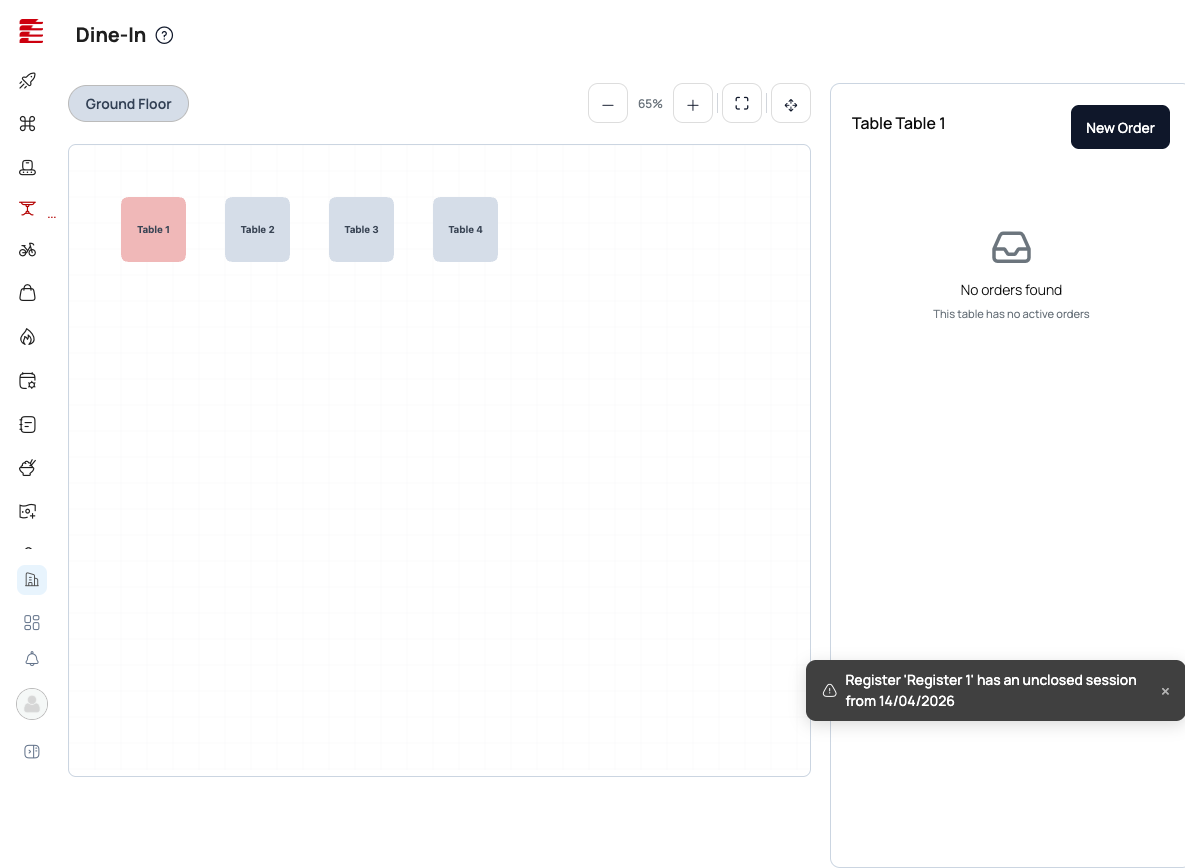
- Light pink with a red outline: the table you have selected
- Green, amber, orange or red: occupied with an active order, coloured by how long the order has been open: green under 15 minutes, amber 15 to 30, orange 30 to 60, red over 60. A table whose items have all been served shows green.
Chair highlighting: when you select a table, its chairs light up for the guests on its active orders. The number lit is the total Covers of those orders, so a 6-seat table with orders for 4 guests shows 4 lit chairs and 2 unlit. Chairs light up only for the table you have selected.
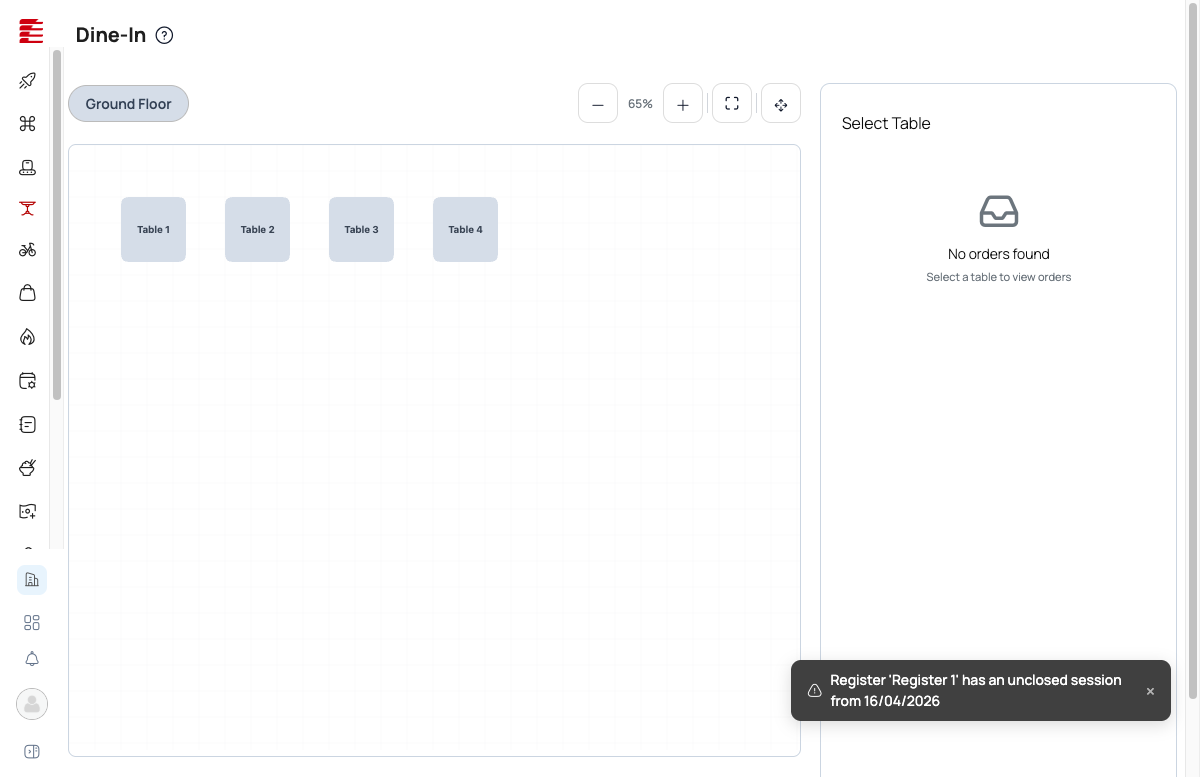
With no table selected, the right panel shows "No table selected" and "Tap a table on the floor plan to view its orders and details" until you pick one.
3. Select a table#
Click a table on the floor plan. The right panel shows:
- The table name (e.g., "Table 1")
- A + New Order button in the top-right of the panel — shown when the table can take a new order (it's free, or your organisation's "Multiple Orders per Table" setting is on). On an occupied table with that setting off, the button is hidden.
- The active orders on that table, or "No active orders / This table has no current orders"
4. Create the order#
Click New Order. Foodops opens the Counter order form with dine-in fields filled in:
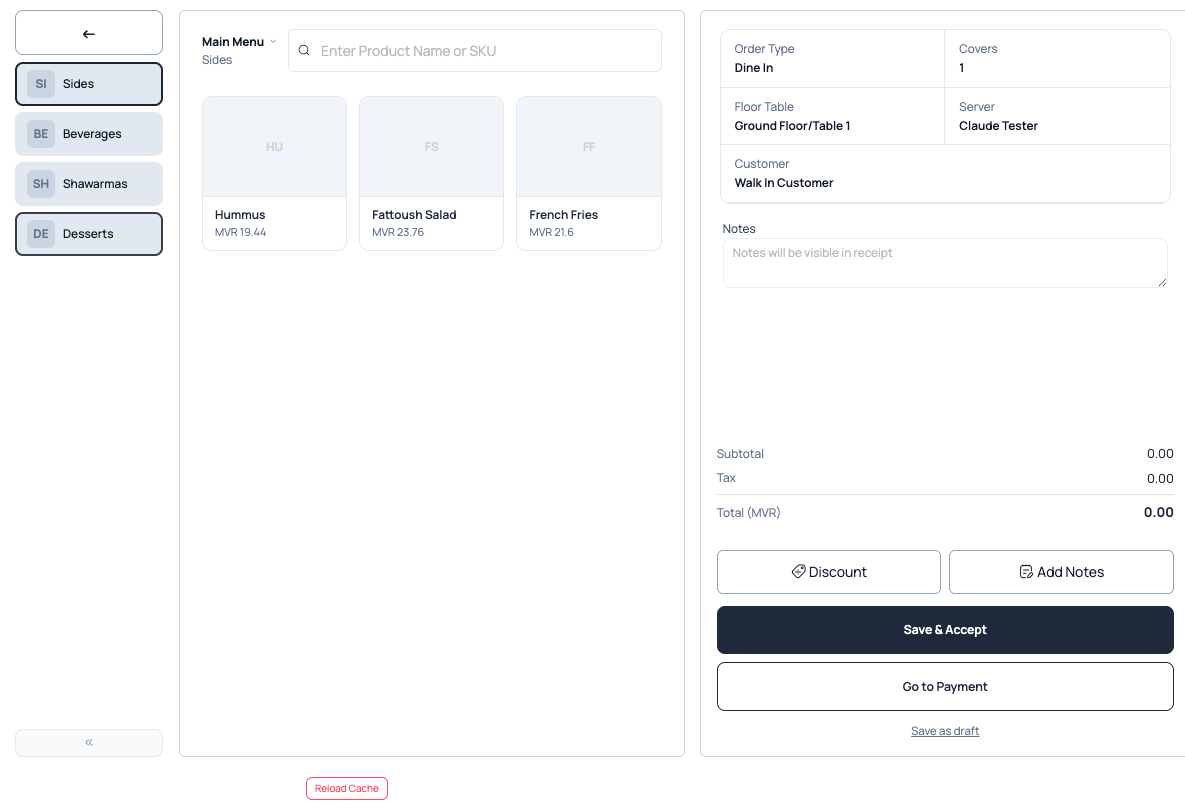
| Field | What it does | Dine-in only? |
|---|---|---|
| Order Type | Locked to "Dine In" | ✅ |
| Covers | Number of guests at the table (defaults to 1) | ✅ |
| Floor Table | Filled in, e.g. "Ground Floor/Table 1" — tells the kitchen and receipt which table | ✅ |
| Server | The staff member who handled service, picked on the form | ✅ |
| Customer | Walk In Customer by default; change it to link a saved customer | Shared |
| Notes | Shown on the receipt and kitchen ticket | Shared |
5. Add items and save#
From here it works just like a POS takeaway order:
- Click categories on the left → click item cards to add them
- Use −/qty/+ on the right to change quantities
- Save & Accept — the order goes to the kitchen and stays open on the table
- Go to Payment — accept and settle now (rare for dine-in mid-meal)
- Save as draft — hold the order without sending it to the kitchen
Once saved, the table changes to the "occupied" colour so every staff member can see it's in use. Select the table to see its chairs light up for the guests.
6. Continue the service#
Dine-in orders usually grow. Tap the same table again and the existing order appears in the right panel — open it to add items, mark it ready, settle the bill, or fire a course to the kitchen. The order goes:
New → Accepted → Preparing → Ready → Served (or → Cancelled)
Closing the order (by taking payment) turns the table back to Available.
Key concepts#
- Floor — a named area of your restaurant (Ground Floor, First Floor, Rooftop, Terrace). The number of floors you can have depends on your plan.
- Table — a seating spot on a floor, with a number and seat count. Set up in Settings → Outlets → Outlets → [your outlet] → Floor plan.
- Covers — restaurant term for "number of guests". Used in reporting (revenue per cover) and kitchen planning. Separate from "party size" in bookings, because walk-ins aren't booked.
- Server — the staff member assigned to the order. Used for tip reports, performance reports and sharing service charges.
- Available / Occupied — the states a table shows on the floor plan. Occupied tables change colour the longer their order has been open, which helps the host stand see who has waited longest.
- Chair highlighting — on the table you have selected, chairs light up for the Covers of its active orders, so staff can see how many guests are seated.
- Dine-in without a table — an outlet can switch on dine-in without a table, so staff can start a dine-in order without picking one. The order goes to a built-in "Unassigned" table. This suits venues that don't seat by table (counters, food courts). These built-in tables are never limited to one active order.
Common questions#
Q: I clicked Dine-in at the Counter but nothing happened — where does it go? A: It opens the floor plan with a "back to counter" option. If the floor plan doesn't load, check that (a) the outlet has at least one table set up and (b) the register session is open.
Q: How do I add more floors/tables? A: Settings → Outlets → Outlets → [your outlet] → Floor plan. Add a floor name, then add tables with a number and seat count. Rearrange them by dragging on the floor plan in edit mode. The number of floors per outlet depends on your plan; see Pricing.
Q: Can multiple orders be open on the same table? A: It depends on your organisation's Multiple Orders per Table setting (described as "Enable multiple active orders per table"). With it off, a table can hold only one active order at a time: starting a second order on an occupied table is blocked with "Table is not vacant", and the "+ New Order" button is hidden until the existing order is closed or cancelled. With it on, the right panel lists every active order on the table, and you can start another — useful when one diner wants a separate bill. The built-in "Unassigned" tables are always exempt from the one-order limit.
Q: Can I split a bill across multiple payment methods? A: Yes — at payment you can take several payments (cash + card, for example) on the same order. If your outlet has the Discard bin switched on, you can also drag items to a new order on the same table to split the check into separate orders.
Q: What happens if I select a table that already has an order in progress? A: The right panel shows the existing order instead of "No active orders". Click it to view or edit. Whether you can also start a second order on that table depends on the "Multiple Orders per Table" setting — see above. With it off, "+ New Order" is hidden while the table has an active order; with it on, the button stays available for separate bills.