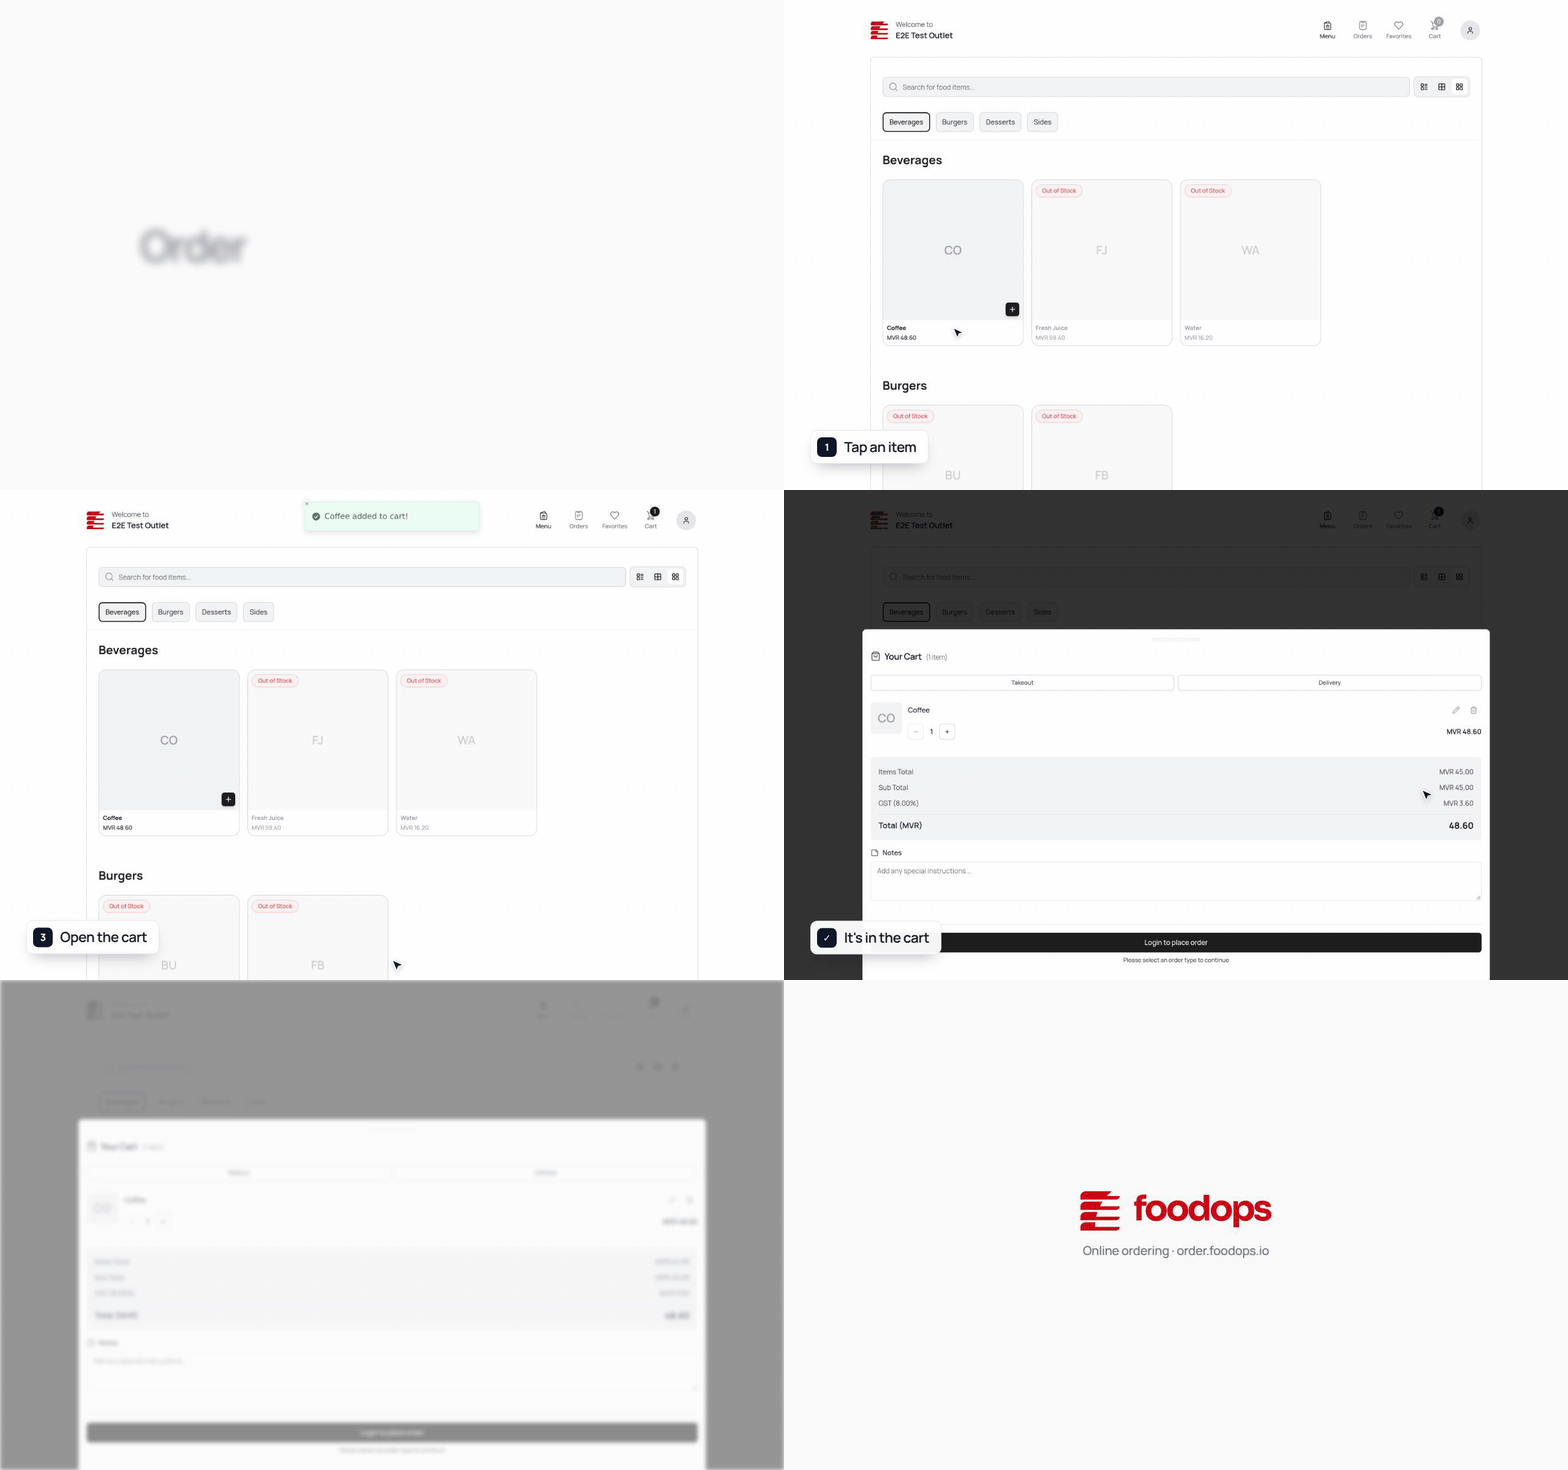
Plain-English summary#
Foodops isn't just the back-of-house POS — it also comes with a customer-facing ordering website. Customers browse your menu at order.foodops.io/your-restaurant, add items to the cart, pick delivery or pickup, and pay online. Online orders arrive at the counter in real time. Delivery is managed from the counter (a Delivery order type) — riders are assigned and tracked there. See Rider App.
When you'd use this#
- Enabling online orders for the first time (restaurant launch)
- Explaining "how does a customer actually order?" to new staff
- Following up on "my customer says they ordered but I didn't see it"
- Planning delivery zones, operating hours, minimum order amounts
Walkthrough — customer's view#
This is the path a customer takes through your ordering site at order.foodops.io.
1. Landing / outlet selection#
There are two ways in:
Direct outlet link: order.foodops.io/your-outlet-code (e.g. order.foodops.io/myrestaurant) — share it on social media, flyers, etc. The customer goes straight to your menu.
Table QR code: printed on table tents. Scanning it opens the menu already set up for dine-in at that table.
The bare site address takes the customer to an outlet picker, where they either:
- Pick a recently visited outlet from a list (showing outlet name, code and when they last visited).
- Tap "Add New Outlet", type the outlet code (placeholder "e.g., myrestaurant"), then tap "Continue".
- Helper text below the Continue button reads "Don't know your outlet code? Contact your restaurant."
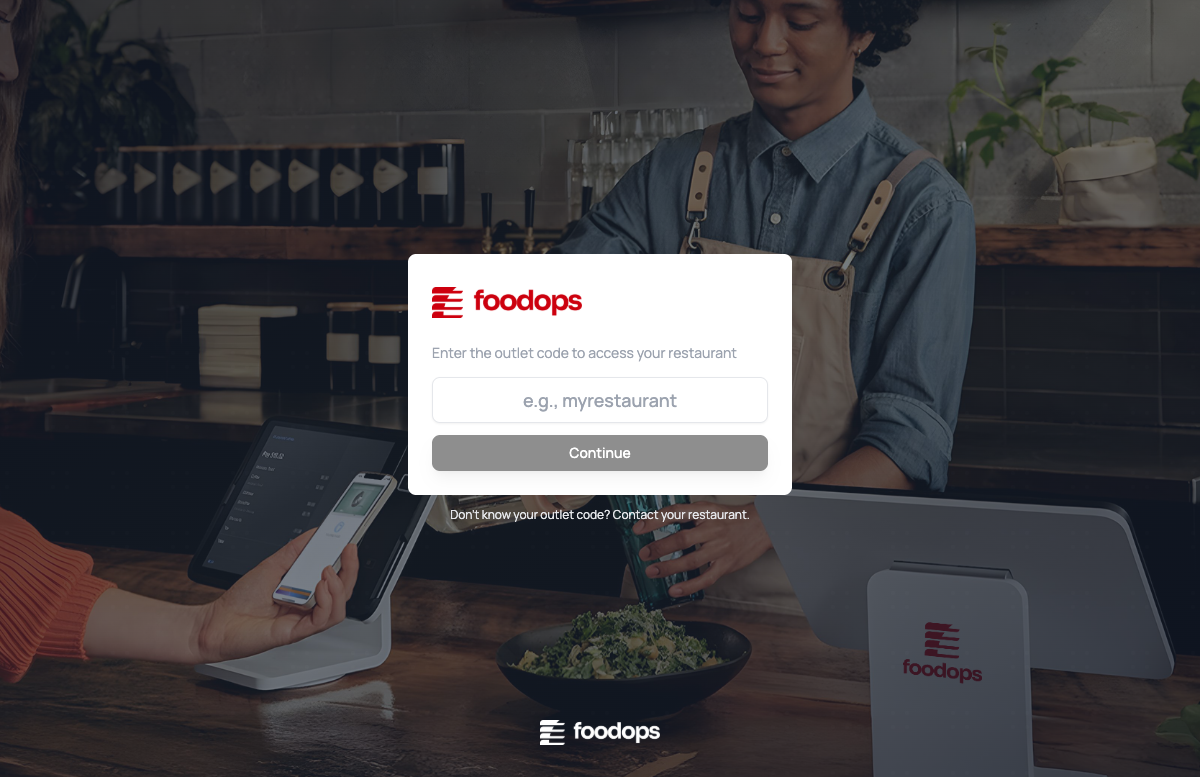
Picking an outlet clears any earlier cart and table, so the customer starts fresh.
2. Menu browse (no login needed)#
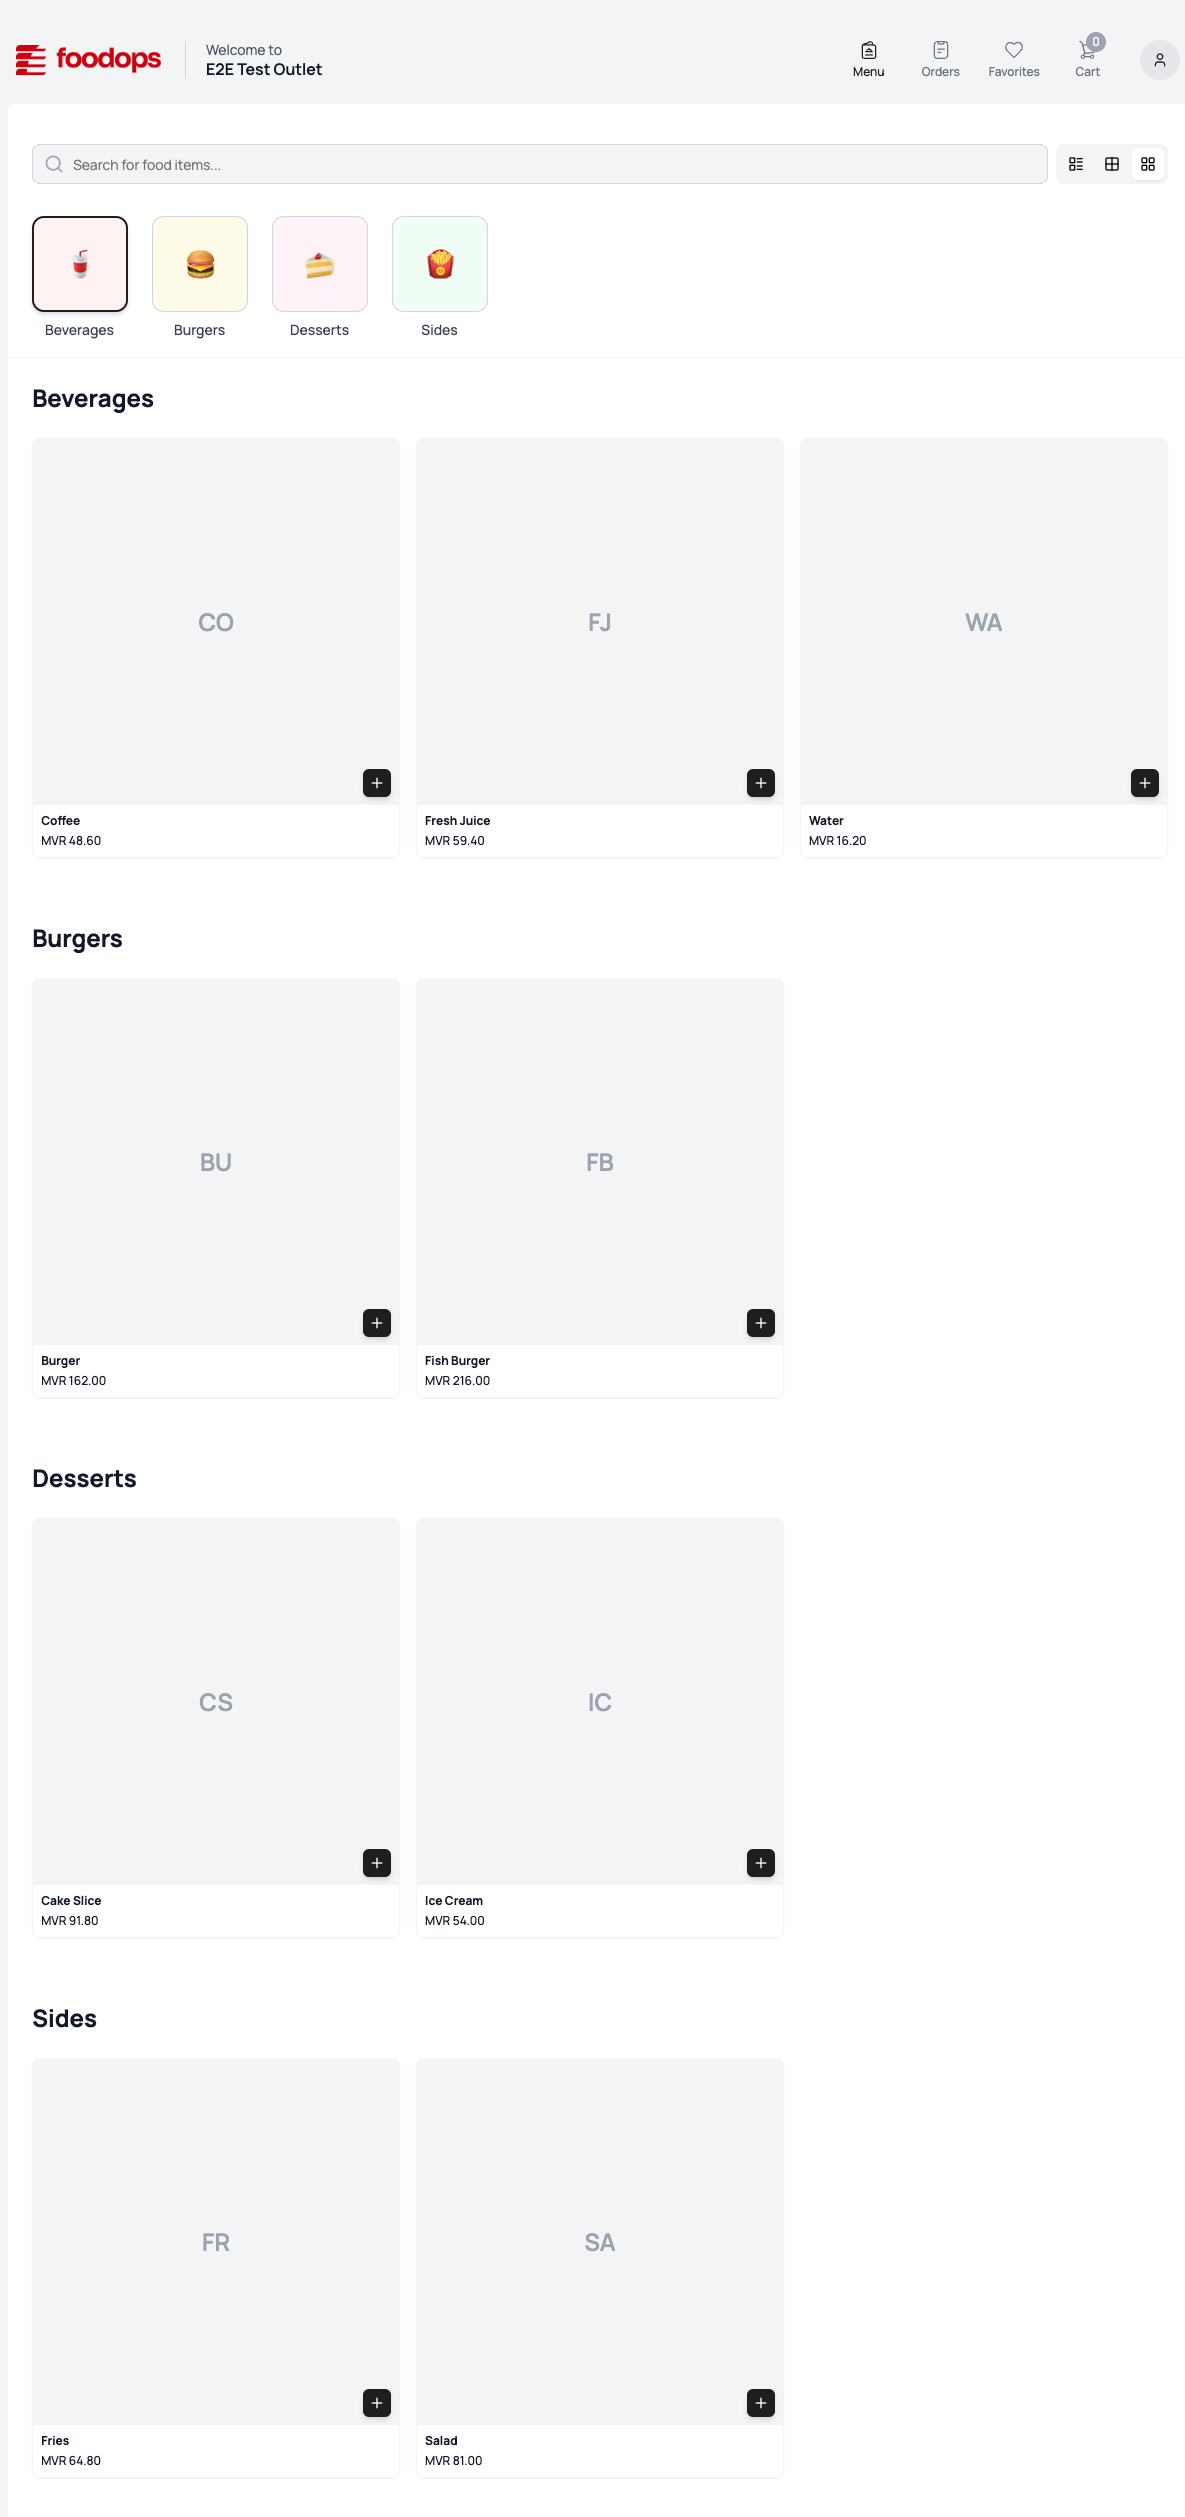
What the customer sees on the menu:
- Header — your outlet logo and outlet name. If no logo is set, the Foodops icon is shown.
- Search bar with placeholder "Search for food items…" and a view toggle (list / single grid / multi grid). The site remembers the chosen view.
- Category tabs — compact text chips that highlight automatically as the customer scrolls.
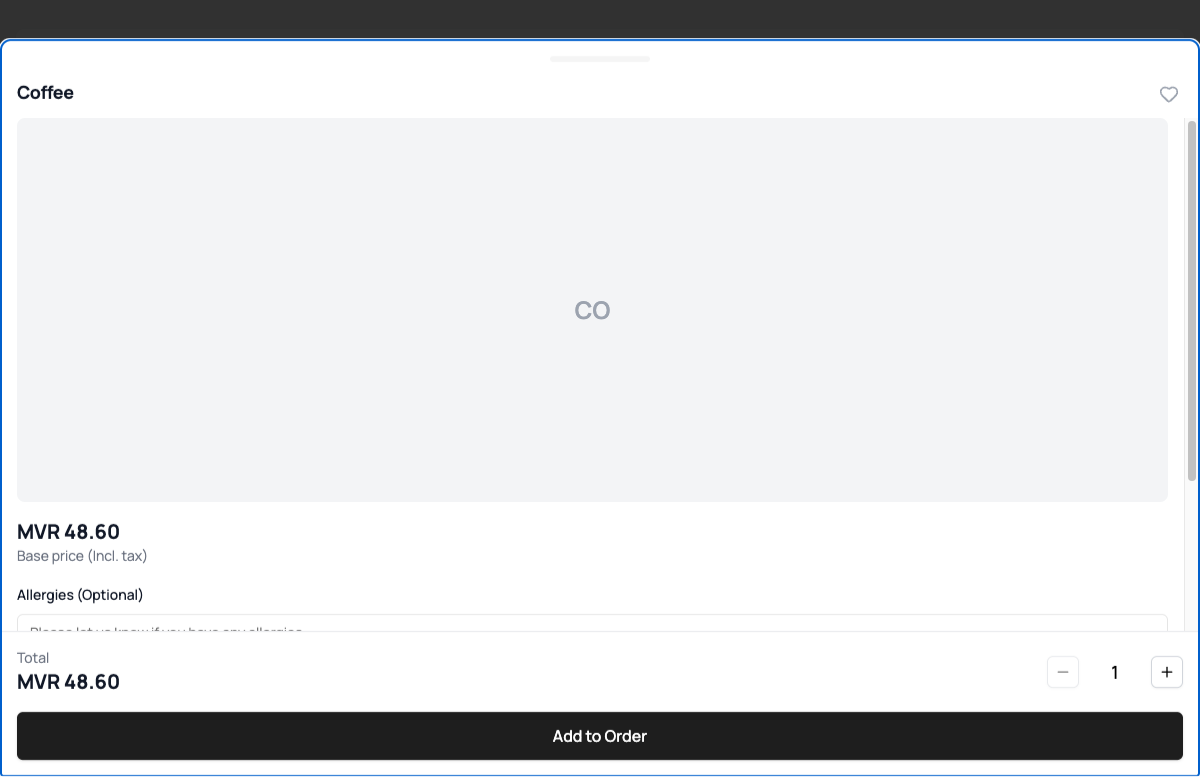
- Product cards in the chosen layout. Tapping one opens the item details (modifiers, special instructions, allergies, quantity). Modifier groups show in your configured display order.
- Right items for the order type — a customer at a table sees only items available for Dine In; a pickup/delivery customer sees only items available for Takeout / Delivery. This follows each item's Dine In / Takeout / Delivery settings.
- Live menu updates — when staff edit items in the POS, the menu updates and the customer sees a notice.
Customers can do all of the above without logging in. The Favorites tab needs a login — until then the heart icons do nothing and the favourites page asks them to log in.
- "Not accepting online orders" banner — when you pause online ordering for the outlet, the menu shows an amber banner: "{outlet name} is not accepting online orders at this time." The same banner appears above the cart's checkout button. Dine-in (table QR) orders and group orders are not affected by that switch, so the banner is hidden for them. This is what customers see when staff turn off Accept Online Orders (in the counter's Session Details, on the Online Orders tab, or in the outlet's settings in the admin). Ordering is also blocked, for every order type, while no register session is open on the outlet.
3. Cart (works without login)#
Tapping the cart icon opens a drawer from the bottom of the screen. For a customer who hasn't logged in:
- The cart is kept on their device.
- Totals include the real tax and service-fee breakdown.
- Multiple taxes: when more than one tax applies, the totals show one line per tax (e.g. CGST (2.50%), SGST (2.50%)); otherwise a single Tax Total line.
- Order-type buttons: Takeout / Delivery, plus Dine In when ordering from a table.
- Choosing Delivery asks the customer to log in before they can pick an address.
- The checkout button stays tappable until they log in.
For a logged-in customer, the cart and totals (including tax and service fees for the chosen order type) are saved to their account.
The button at the bottom of the drawer changes depending on login and outlet settings:
- Not logged in: "Login to place order"
- Logged in, outlet allows immediate payment: "Make Payment"
- Logged in, outlet requires staff to accept first: "Place Order"
- Dine-in where payment is allowed before acceptance: "Place Order" and "Make Payment" side by side
4. Guest checkout#
Tapping "Login to place order" opens a login drawer.
Step 1 — Phone
- Title: "Log in to continue"
- Description: "We'll send a one-time code to verify your number."
- One field: phone number, placeholder "Enter your phone number", at least 7 digits.
- Two buttons: WhatsApp and Text message. The customer picks how the code is sent. Indian and Maldivian phone numbers both work.
Step 2 — OTP
- Title: "Enter verification code"
- Description: "Code sent via WhatsApp to {phoneNumber}" or "Code sent via text message to {phoneNumber}", depending on the button chosen
- 6-digit code input.
Step 3 — Profile check
- Title: "Signing you in…" with a spinner. If the customer already has a name on file, the drawer closes.
Step 4 — Name (only if no name on file)
- Title: "What should we call you?"
- Description: "Set your name so we can personalise your orders."
- Body copy: "We'd like to know what to call you. This will be used on your orders."
- One text field, placeholder "Your name", 2–80 characters.
- Button: "Save".
After the drawer closes, the order goes ahead automatically — no second tap needed.
Cart after login: the items the customer added before logging in move into their account. If this is still in progress after 15 seconds, the order is held and the customer sees "Your cart is still syncing. Please try again in a moment." — so an order never goes through with missing items.
What guest checkout requires: a phone number (verified by code) + a name. That's the minimum. Email is optional and can be added later on the Profile page. Delivery orders also need an address. The customer can track their order later by signing in again with the same number.
5. Order mode selection#
The order mode comes from how the customer arrived — there's no separate page:
- Scanned a table QR code → the cart defaults to dine-in at that table.
- Opened your outlet link (no table) → the cart drawer shows the Takeout / Delivery toggle.
A customer scanning a table QR sees only items available for dine-in; a customer ordering for delivery never sees dine-in-only items. This is enforced by Foodops, so out-of-channel items can't get into an order even if the customer switches order type.
6. Group order (several phones, one shared cart)#
Group ordering is available for dine-in table QR sessions only.
Host:
- A logged-in customer opens the cart and taps "Start Group Order".
- If they're not logged in, the login drawer opens first (the host must be logged in).
- A window explains: "How it works — You'll get a QR code that others can scan to join your group. Everyone can add items, but only you can place the final order." The display name is prefilled from their profile.
- Footer note: "The group order will expire after 2 hours of inactivity."
- The host gets a 6-character share code and a QR code, with Copy Link, Share, and a live count of participants. The link looks like order.foodops.io/join/share-code.
Joining:
- Another customer scans the QR or opens the link. They see the outlet, table, host name and number of participants.
- If they were on a different outlet or table, the site switches to the group's outlet and table.
- Customers who aren't logged in must log in to join.
- They confirm the outlet, table and host, and enter a display name (prefilled from their profile if available, max 50 characters).
- The cart drawer now shows items grouped by person, with (You) / ★ Host badges and a subtotal per person. Everyone can add or remove their own items.
Live updates: everyone's cart updates as people add items, join or leave, and a notice shows when someone joins or leaves.
Placing the order: only the host can place the order. When they do:
- The group cart becomes one order. Everyone else sees "The host has placed the group order!" and their cart closes.
- The host's own cart is cleared, and all carts on the devices are emptied.
A participant leaving keeps the group going; the host leaving ends it for everyone (the confirmation message makes the difference clear).
7. Order tracking after submit#
After an order is placed:
- The cart closes. If you've set up a feedback question for ordering, the customer may be asked for a rating and an optional review.
- The customer is taken to their orders page.
- Orders are split into Ongoing / Completed, and can be sorted and searched. Each order shows a progress bar for its type:
- Delivery: Placed → Accepted → Preparing → Ready → Enroute → Delivered (6 steps)
- Takeout: Placed → Accepted → Preparing → Ready → Picked Up (5 steps)
- Dine-in: Placed → Accepted → Preparing → Ready → Served (5 steps)
- Live updates — the status moves along automatically as your staff and kitchen update the order.
- Cashiers see online-order updates at the counter the same way customers do.
- If the customer's connection drops, updates resume when they're back online.
Customers who ordered as guests can find their orders again by signing in with the same phone number — orders belong to the customer, not the device.
Key concepts#
- Online ordering site — your public ordering website at order.foodops.io/your-restaurant. Guests can check out with just a phone number and name.
- Outlet reference code: the short code you enter as the Reference code in the outlet's settings (Settings > Outlets). It's the last part of your ordering link, for example order.foodops.io/myrestaurant.
- QR-code dine-in — printed table QR codes open ordering already tied to that table. The customer scans and orders; the order shows on the POS and kitchen display against the correct table.
- Live updates — order status stays up to date between the ordering site, the counter, and the customer's tracking page.
- COD (Cash on Delivery) — payment collected by the driver at the door. Reported separately from online payments for reconciliation.
- Delivery zone: an area with its own delivery charge. The customer's address falls into one zone at checkout. The minimum order amount is set per outlet, in the outlet's Ordering settings, not per zone.
Common questions#
Q: How do customers find my online ordering page? A: Share the link directly (order.foodops.io/your-outlet-code), print it on flyers, add it to social media bios, or use the generated QR-code sheets. Foodops doesn't advertise it for you — getting it in front of customers is up to you.
Q: Does every menu item automatically appear online? A: Yes by default. Turn individual items off in the Item edit form (Ordering Availability = off) if you want to keep something POS-only.
Q: Can I pause online orders during a rush without taking the site offline? A: Yes — turning off Accept Online Orders for the outlet (counter: Session Details > Online Orders tab; admin: the outlet's settings) pauses new takeaway/delivery orders. While it's off, customers see an amber "{outlet} is not accepting online orders at this time" banner on the menu and cart, and online orders can't be placed. Dine-in (table QR) and group orders are unaffected by that switch. Orders already in progress continue normally. Separately, no order of any type can be placed while there is no open register session on the outlet.
Q: What happens if a customer orders something out of stock? A: For items whose stock is tracked, once the available stock (what you have minus what is already committed to other orders) is used up, the item stays on the menu but is greyed out with an Out of Stock badge and can't be added. This is checked again when the order is submitted. It doesn't apply to items that don't track stock, or to items set to allow selling without stock.
Q: How do customer orders appear at the POS? A: They arrive in the counter's normal Open list (there is no separate tab for online orders), tagged Ordering App, with status New. Staff press Accept or Reject. A paid order can't be rejected until its payment has been refunded.