

Plain-English summary#
Customers are people or companies who owe you money or have an ongoing relationship with you. Walk-ins don't need a customer record — they pay and leave. But corporate clients with monthly tabs, regulars with credit, catering customers, and anyone you invoice need a record here so Foodops can track what they owe, their payment terms and their credit limits.
When you'd use this#
- A company books catering and pays Net-30 → create a customer with the Net 30 payment term
- A regular has a running tab → attach their name to orders and pay off the balance weekly
- You want to see "who are my top 10 customers by revenue" → customer records feed the Sales By Customer report
- Issuing formal invoices with the customer's TIN for tax compliance
- Storing a standing discount on a customer's record
If you only do cash walk-in sales, you'll rarely use this screen — "Walk In Customer" is the default on every POS order.
How to access#
- Sidebar: Sales > Customers
- From POS: order screen → Customer field → search or "Add New"
Prerequisites#
- A role that can view and create customers (on by default for Counter, Manager, Owner and Administrator)
- For GST invoices to registered customers: a GST tax set up (Settings → Taxes)
- For credit customers: the payment terms and credit limits you've agreed
Walkthrough — create a customer#
1. Open the Customers list#
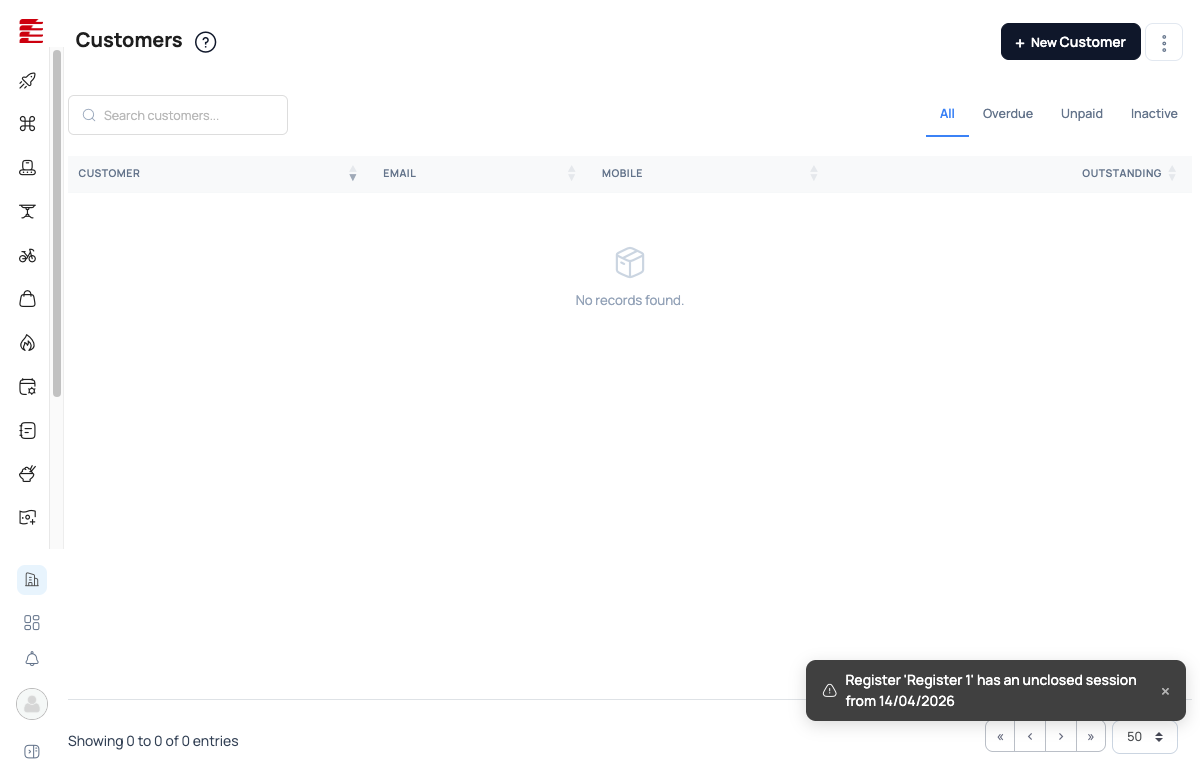
Open Customers from the sidebar. The list has 5 tabs — Active · Inactive · Overdue · Unpaid · All — and columns Customer, Reference, Contact, Outstanding, Credits. Email and mobile are shown together under Contact; Reference is the customer's reference code; Credits shows unused credit-note balance.
2. Click "Add customer"#
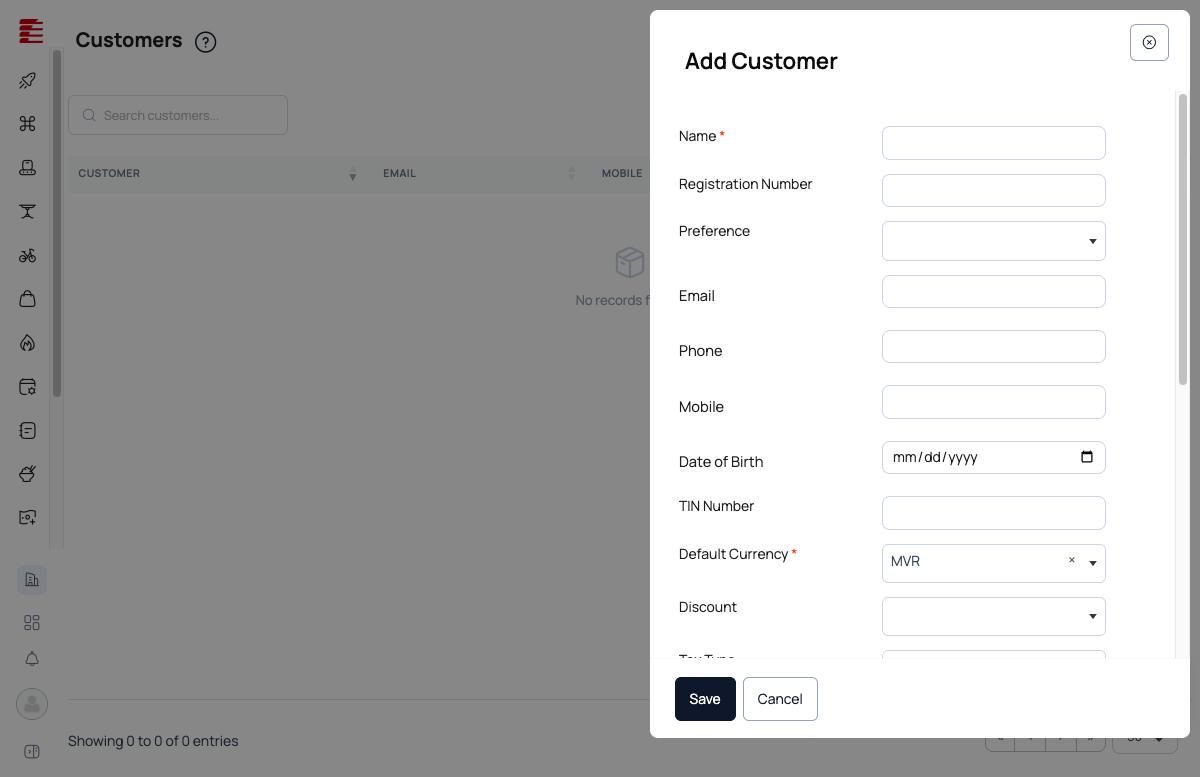
The full "Add Customer" form opens. It matches the Supplier form — customers and suppliers have the same set of fields. The quick-add from the POS order screen ("Add New" in the customer picker) is a shorter form — see the note below the table.
| Field | Purpose |
|---|---|
| Name ⃰ | Display name (person or company) |
| Registration Number | Company registration number — for business customers |
| Preferred contact | Preferred contact method (Email / Phone / Mobile) |
| Email / Mobile / Phone | Contact details (fill in at least one of the three) |
| Date of Birth | Optional — used by birthday and segment filters in customer reports |
| TIN Number | Tax Identification Number — required on GST tax invoices |
| Default Currency ⃰ | Required. Pick the customer's currency from the list |
| Discount | A standing discount saved on the customer. It is applied automatically as the order discount when you pick this customer at the POS (see step 5 below). |
| Tax Type | Zero or GST — sets the tax lines on their invoices |
| Payment Term | Due on Receipt / Net 5-60 — decides when a balance becomes overdue |
| Credit Limit | Maximum they can owe on credit sales — a credit sale that would go over it is blocked at the POS (see the credit-limit question) |
| Credit Status ⃰ | Required — the customer's credit standing |
| Assigned User | The staff member who manages this customer |
| Billing Address | Address Line 1, Address Line 2, City, Post Code, Country |
Note: Two different customer forms The full form above (with Registration Number, Date of Birth, Phone, Discount, Tax Type, Payment Term, Credit Limit, Credit Status, Assigned User, Billing Address) opens from the Customers list and the customer's detail page. The quick-add from the POS customer picker ("+ New Customer") only asks for Mobile (required), Name, Email, TIN Number, a Delivery Address, and an optional Discount. To set a payment term, credit limit, tax type and so on, use the full form on the Customers page.
3. Save#
The customer is available in the POS customer picker straight away. Their Outstanding balance starts at MVR 0.00.
Walkthrough — attach a customer to an order#
- Start a new order at the POS (Takeout, Dine-in, or Delivery)
- In the order summary on the right, click the Customer field (defaults to "Walk In Customer")
- Search by name, mobile, phone, reference or registration number
- Select the customer — the order is now linked to them
- The customer's Tax Type sets how tax is handled. On a credit sale (Charge to customer account), the order amount is added to their Outstanding balance instead of being paid at checkout. If the customer has a saved Discount, it is applied automatically as the order discount when you pick them, unless a discount or loyalty redemption has already been entered on the order. It may not apply if the order already has a payment taken or is closed.
Key concepts#
- Customer — a person or company you deal with beyond one-off walk-in sales. Has contact details, payment terms, currency, tax type, credit limit, assigned user and an outstanding balance.
- Walk In Customer — the default "unknown customer". POS orders not linked to a specific customer go here. No credit, nothing owed — the order is paid at checkout.
- Outstanding balance — invoiced orders minus payments received. Shown in MVR on the list.
- Payment Term — same as for suppliers: Due on Receipt (straight away) or Net N (N days after the order). Decides when an order becomes "overdue".
- Credit Limit — the most a customer can owe you. It only applies to credit sales (Charge to customer account / "Credit" / "Credit & Close"): if a credit sale would push Outstanding over the limit, the POS blocks it with a "Credit Limit Exceeded" error. There's no override in the app. Cash and card sales are never blocked by the credit limit (they add nothing to Outstanding).
- Standing Discount: you can save a discount on the customer record. When you pick that customer at the POS it is applied automatically as the order discount, unless the cashier has already entered a discount or a loyalty redemption on the order.
- TIN — Tax Identification Number. Required on formal GST tax invoices to registered businesses.
- Date of Birth — feeds birthday marketing filters in customer segments and reports.
Common questions#
Q: Is Walk In Customer a real customer record? A: Yes — it's the catch-all for orders without a named customer. Don't delete it, and don't create your own "Walk In" customer — Foodops relies on the default one. It's protected: the app won't let you edit it.
Q: Can I search for a customer by phone number? A: Yes — the POS customer search matches Name, ID/Registration number, Mobile, Phone and Reference. It does not match email, and you need to type at least 2 characters. If a customer doesn't come up, they may be Inactive or hidden — check the Customers list.
Q: How does credit limit work during POS checkout? A: The credit limit is only checked when you settle an order on credit (Charge to customer account / "Credit" / "Credit & Close"). If current Outstanding plus the order total is more than the credit limit, the POS shows "Credit Limit Exceeded" and blocks the credit sale — there's no override or manager approval. To go ahead, take payment now (cash and card sales aren't limited), settle some of the customer's balance first, or raise their Credit Limit on the customer record. A Credit Limit of 0 (or blank) means unlimited credit.
Q: Can I delete a customer with past orders? A: No — a customer with any transactions or a balance that isn't zero can't be deleted. You'll see one of two messages: "Customer has an outstanding balance and cannot be deleted. Settle the balance first, or mark the customer as Inactive." or "Customer has transactions and cannot be deleted. Mark the customer as Inactive instead." A customer with no transactions and a zero balance can be deleted — they disappear from all views. For customers with history, mark them Inactive instead. (There's no merge-duplicates feature — deactivate the spare record.)
Q: What happens to a customer I set Inactive? A: Their status changes to Inactive (the 3-dot menu shows Deactivate for an Active customer and Activate for an Inactive one). POS customer search only finds Active customers, so an Inactive customer no longer appears in the order-screen picker. Their past orders stay linked. Reactivate any time with Activate.