Plain-English summary#
Suppliers are the vendors you buy ingredients and supplies from. Purchase orders (POs) are the formal records of what you ordered from them, at what price, and when it's due. When the goods arrive, you receive them against the PO — stock goes up. When you bill the PO, the supplier's outstanding balance tracks what you still owe. This is the buying side of Foodops, the counterpart to sales.
When you'd use this#
Every time you reorder chicken, vegetables, drinks, packaging, or cleaning supplies. Without POs, stock goes up "magically" through manual adjustments and nobody knows what's owed to whom. With POs, you have an audit trail: ordered → received → paid, with reports across any date range.
How to access#
- In the admin app (admin.foodops.io), open the Expenses section of the sidebar.
- From there you'll find Suppliers, Purchase Orders, Bills, Payments Made and Supplier Credits.
The full PO lifecycle is covered in Purchase Orders. This article focuses on the supplier directory and the buying loop.
Prerequisites#
- At least one outlet with a warehouse (a default "Primary Warehouse" is created for each outlet during onboarding).
- Permission to add suppliers on your role (any admin-level user has it).
- If you use approvals: a user with PO approval permission, set up in Settings → Users & Roles.
Walkthrough A — create a supplier#
1. Open the Suppliers list#
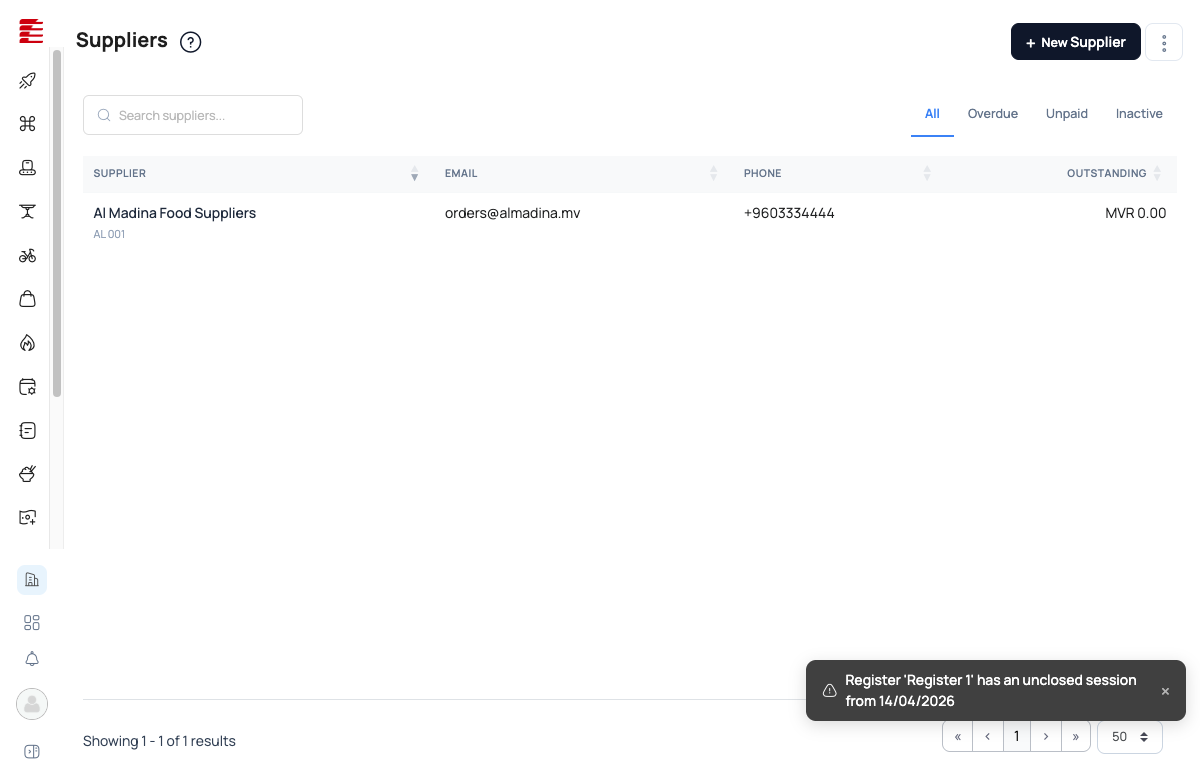
The list shows Supplier, Reference, Contact (email and phone), Outstanding (what you owe this supplier), Credits and Status. Filter tabs above the list: All · Overdue · Unpaid · Inactive. Search by name with the search box at the top left.
2. Click "Add supplier"#
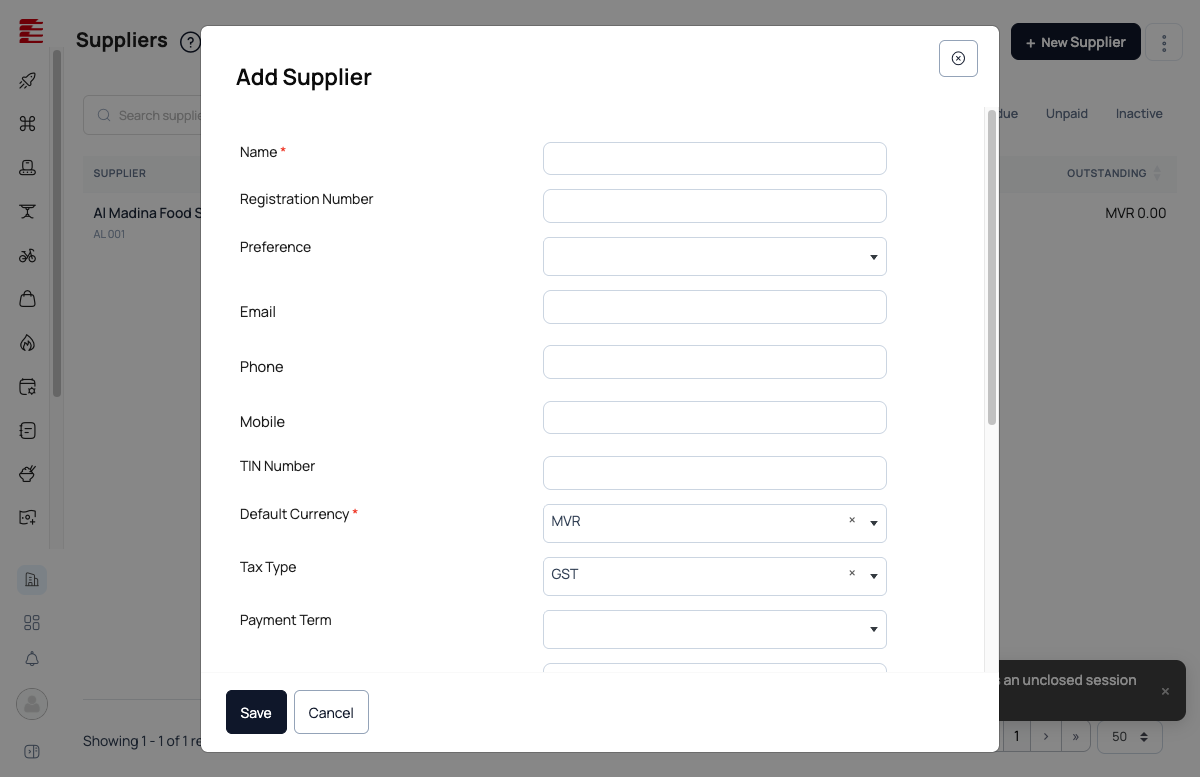
A form opens. Only the supplier name is required; everything else can be filled in later:
| Field | Purpose |
|---|---|
| Supplier name ⃰ | Display name (e.g., "Al Madina Food Suppliers") |
| Tax ID (TIN) | Optional. Needed to reclaim GST on their invoices |
| Email / Phone | Contact details |
| Contact person | Who you deal with. Use Another contact to add more people |
| Payment terms | Default for every bill from this supplier; you can change it per bill. Decides when this supplier's bills become "overdue" |
| Currency | The currency this supplier bills in |
| Default expense account | The account their bills are recorded against by default |
| Billing and Collection addresses | Street, city and post code. Collection can be copied from billing |
| Reference code | Your own reference for this supplier |
| Category | Groups suppliers |
3. Save#
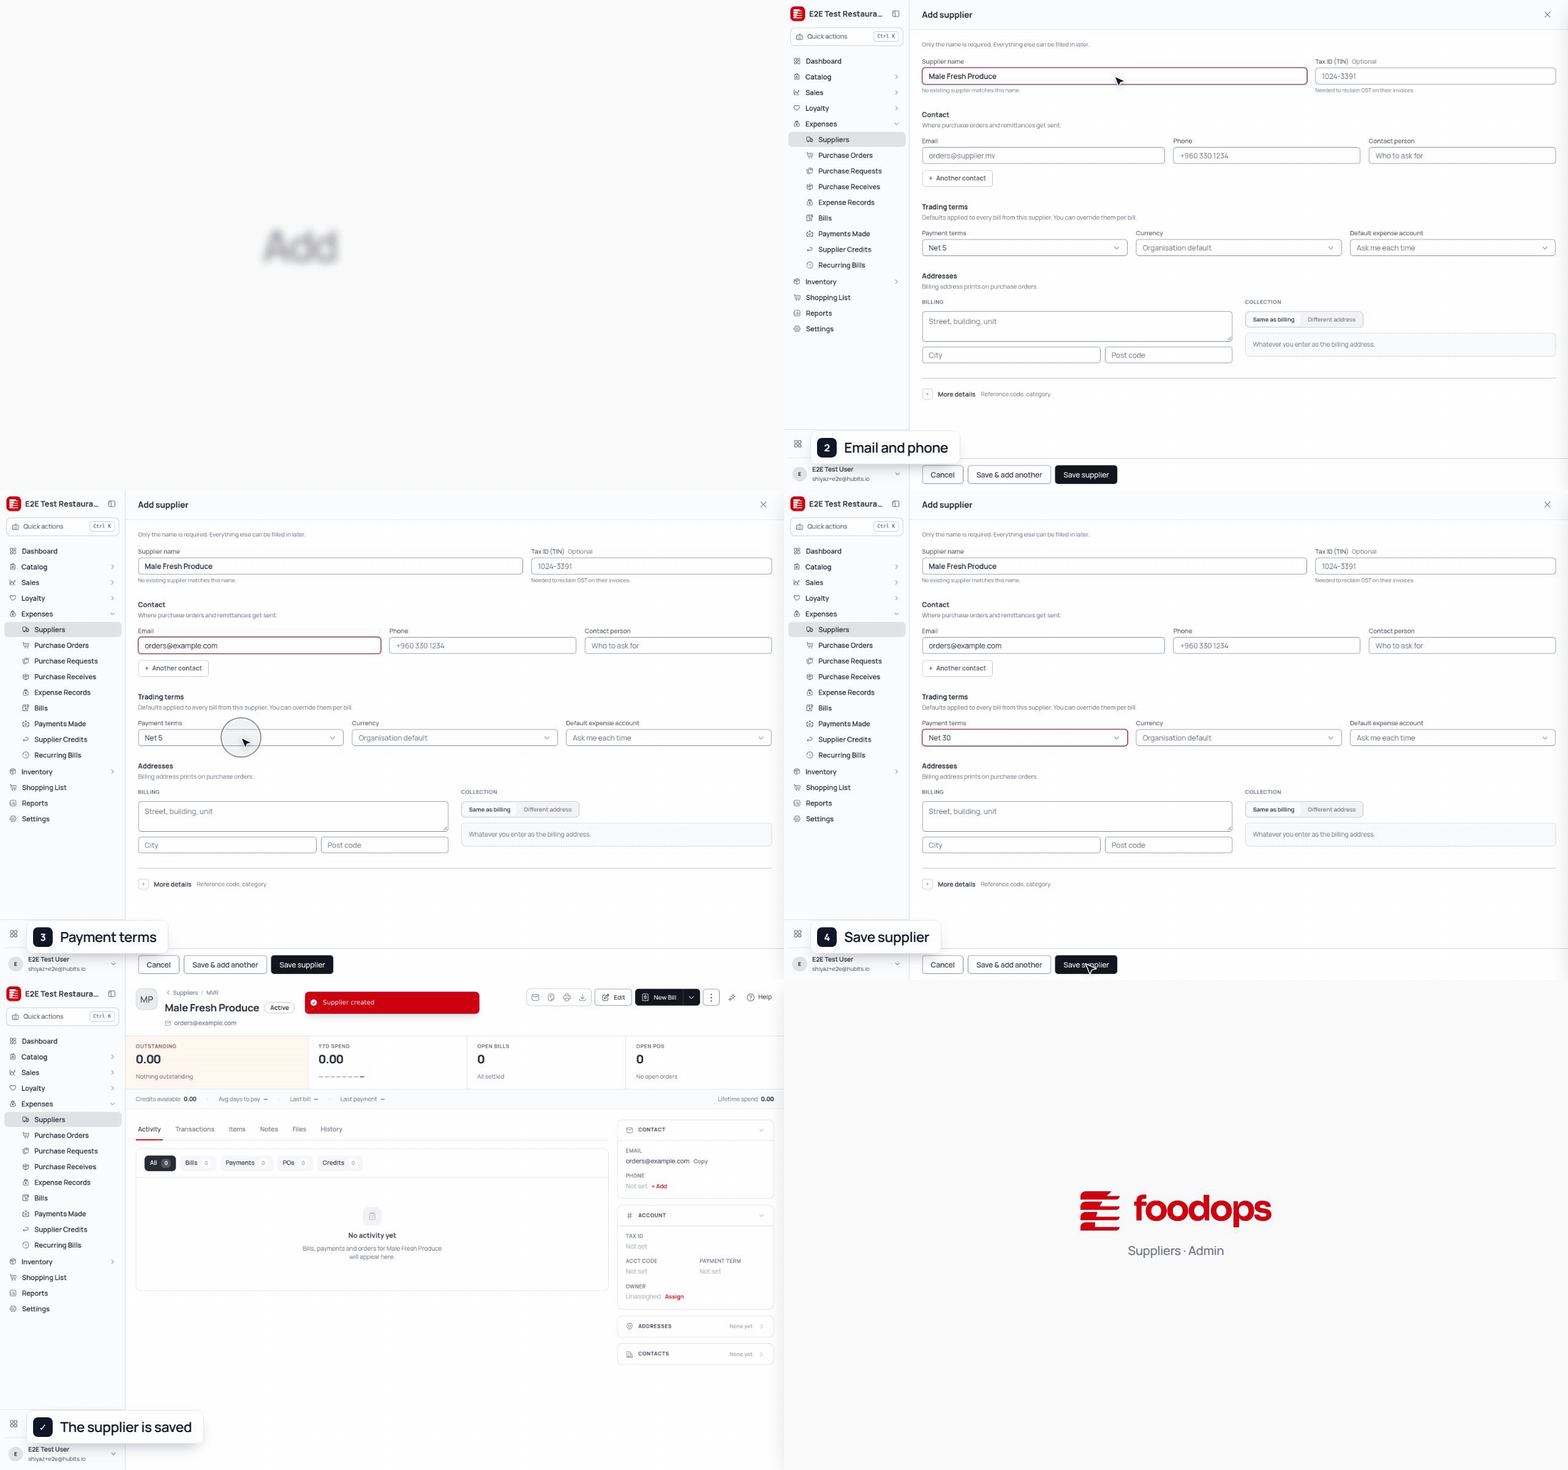
Click Save supplier. The supplier is active straight away, shows in the Suppliers list with Outstanding MVR 0.00, and appears in the supplier dropdown when you create POs.
Walkthrough B — create and receive a purchase order#
1. Open the Purchase Orders list#
The list shows PO / Supplier, Ordered, Delivery, Receive · Bill, Total and Status. Status tabs: All · Open · Approvals · Completed · Cancelled.
2. Click "New Purchase Order"#
A full-page form opens with the supplier and order details at the top, the items below them, and the totals at the bottom. There are no tabs.
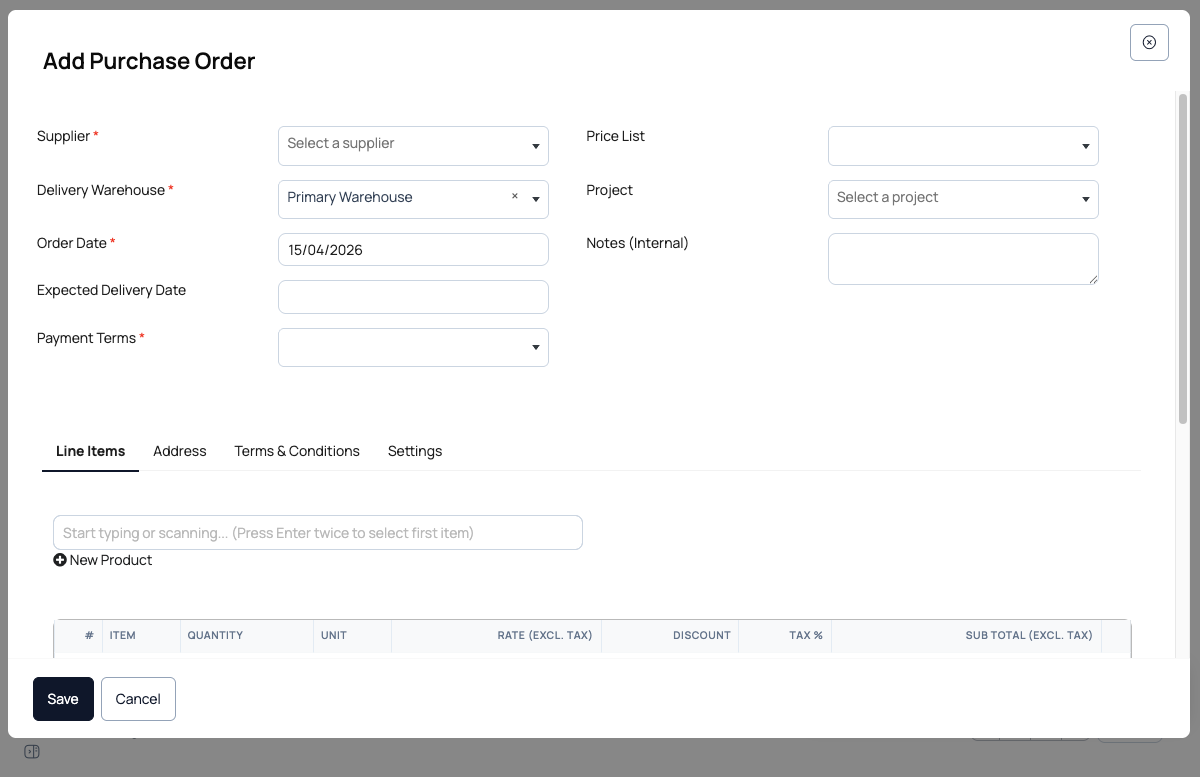
Header fields (required marked with *):
| Field | Purpose |
|---|---|
| Supplier ⃰ | Choose from your existing suppliers, or add a new one without leaving the form (see the questions below). Once picked, a Deliver to address shows under it; click to edit it |
| Delivery warehouse ⃰ | Where the stock lands when received. Defaults to the outlet's "Primary Warehouse" |
| Order date ⃰ | Defaults to today |
| Expected delivery | Optional - used for "expected vs actual" delivery-delay reporting |
| Payment terms ⃰ | Overrides the supplier's default for this PO if needed |
| Price list | Attach the supplier's pre-agreed price list, if there is one |
| Project | Cost-centre tag for POs that aren't general inventory (e.g., one-off event stock) |
| Notes | Internal free text, not printed on the order |
| Terms & conditions | Free text printed on the order sent to the supplier |
| PDF template | The layout used when the order is printed |
3. Add line items#
In the items section, use the product picker ("Start typing or scanning.. (Press Enter twice to select first item)") or + New Product to create one on the spot. Each line has:
| Column | Meaning |
|---|---|
| # | Line number |
| Item | Product being purchased |
| Quantity | Ordered quantity |
| Unit | Purchase unit of measure |
| Rate (excl. tax) | Price per unit before tax |
| Discount | Line discount, amount or % |
| Tax % | Tax rate applied |
| Sub Total (excl. tax) | Calculated for you |
4. Totals#
Below the line items:
- Sub total - sum of line sub-totals
- Discount — order-level discount
- Taxable amount - sub total less discount
- Tax - tax across all lines
- Shipping charge - entered by hand
- Adjustment — rounding or one-off correction
- Total — final amount
5. Delivery address and terms#
- Deliver to - click it under the supplier to change the delivery address if it differs from the warehouse default
- Terms & conditions - free text printed on the PO
6. Save#
Click Save. The PO starts in its first status (by default Draft). Only set status moves are allowed. The default flow is Draft → Pending Approval → Approved → Sent to Supplier → Partially Billed → Billed → Closed, with Cancelled as the way out. Your organisation can configure its own statuses, so yours may differ. See Purchase Orders for the full lifecycle.
7. Receive the goods (a separate Purchase Receive)#
When the supplier delivers, open the PO and choose Receive items. This creates a separate Purchase Receive. Pick the destination warehouse/location (required), enter the quantities actually received on each line (can be less than ordered for a partial delivery), and save. Receiving is the moment ingredient stock goes up — not creating the PO, and not billing it. You can receive again later for the rest.
8. Bill and pay (separate Create Bill + Payments Made)#
Create Bill from the PO details (or tick the receive's "post bill" option) to record what you owe. The supplier's Outstanding balance goes up when the bill is posted, and the Payment Term starts the due-date countdown ("Net 30" = due in 30 days). Record payments in Payments Made against the bill to clear the balance. The Suppliers list's Overdue and Unpaid tabs show who you owe and how much.
Key concepts#
- Supplier - a vendor you buy from, with contact info, default payment terms, currency and an outstanding balance. You can have many suppliers.
- Purchase Order (PO) — a formal record of what you intend to buy: supplier, delivery destination, line items, prices and payment terms. Statuses follow a set flow (default: Draft → Pending Approval → Approved → Sent to Supplier → Partially Billed → Billed → Closed). A PO is never fully deleted — cancelling keeps the audit trail. Receiving stock and creating the bill are separate follow-on documents.
- Warehouse — the physical place stock lives. Each outlet has at least one (Primary Warehouse). Organisations with several outlets may have central warehouses on higher plans.
- Payment Terms — when invoices are due: Due on Receipt (immediately) or Net N (N days after receipt). Drives what counts as overdue.
- Outstanding balance — what you've been billed by a supplier minus what you've paid. Shown in MVR on the Suppliers list.
- TIN (Tax ID) - Tax Identification Number. Optional on the form, but needed to reclaim GST on the supplier's invoices.
- Approval workflow — optional: new POs above a threshold go to Approvals and need a user with PO approval permission to move them on.
Common questions#
Q: Can I create a supplier while I'm creating a PO? A: Yes. Type the name in the Supplier box and choose New Supplier. The supplier form opens on top of the PO; save it and you come back to the PO with the new supplier ready to use.
Q: What's the difference between Delivery warehouse and the Deliver to address? A: Delivery warehouse is where stock is added when received. The Deliver to address is the physical address printed on the PO. With one outlet they're usually the same place; with several they can differ (e.g., PO billed to HQ, delivered to Outlet 3).
Q: How do I track partial deliveries? A: Use Receive items to create a Purchase Receive and enter what actually arrived on each line. Each receive is its own document, the PO keeps a running total received, and you can receive again later for the rest. Billing (Partially Billed / Billed) moves separately with how much you've billed — receiving alone doesn't complete the PO.
Q: Can I edit a PO after it's saved? A: Yes — it's best done before receiving or billing. What you can change depends on the PO's status and your organisation's policy (avoid editing once it's Billed or Closed). To fix a mistake after stock has been received, make an inventory adjustment or a corrective receive instead.
Q: What happens if I cancel a PO that was already partly received? A: Stock already received stays in inventory (it physically exists). Cancelling only voids the lines still outstanding. The partial receipt stays on the supplier's record.